
Creating a Micro Galaxy Squadron Escape Pod Diorama
In this project, we explore the creation of a compact diorama stand designed for the Micro Galaxy Squadron Escape Pod, featuring R2-D2 and C-3PO from the Series 4 blind box. This blog post outlines the step-by-step process, materials used, and techniques applied to craft a visually appealing and functional diorama, as demonstrated in a recent YouTube video.
Project Overview
The diorama base, roughly the size of a Post-It note (3 inches by 3 inches), is designed to hold the Escape Pod securely while allowing flexible positioning of the R2-D2 and C-3PO figures. The project combines 3D printing, painting, and weathering techniques to achieve a realistic, desert-themed display with a crash-landed aesthetic.
Materials and Tools
The following supplies and tools were used to complete the diorama:
Vallejo Texture Acrylic: Earth - Desert Sand https://amzn.to/3UzdRPW
Mini Cordless Drill https://amzn.to/4hAHtXe
Hand Drill https://amzn.to/3NYb2nG
Vallejo Black Wash https://amzn.to/3YyFN7F
Vallejo Chrome Metal Color https://amzn.to/4hwbHul
Digital Caliper https://amzn.to/3AfpqVK
3D Printers/Supplies Used:
ELEGOO Neptune 3 Pro https://amzn.to/3NV5oTG
ELEGOO Gray PLA Filament https://amzn.to/3YyG22z
Note: The links provided are Amazon Affiliate links. Purchasing through these links may earn a commission, supporting the creation of more content.
Step-by-Step Process
1. Designing the Base
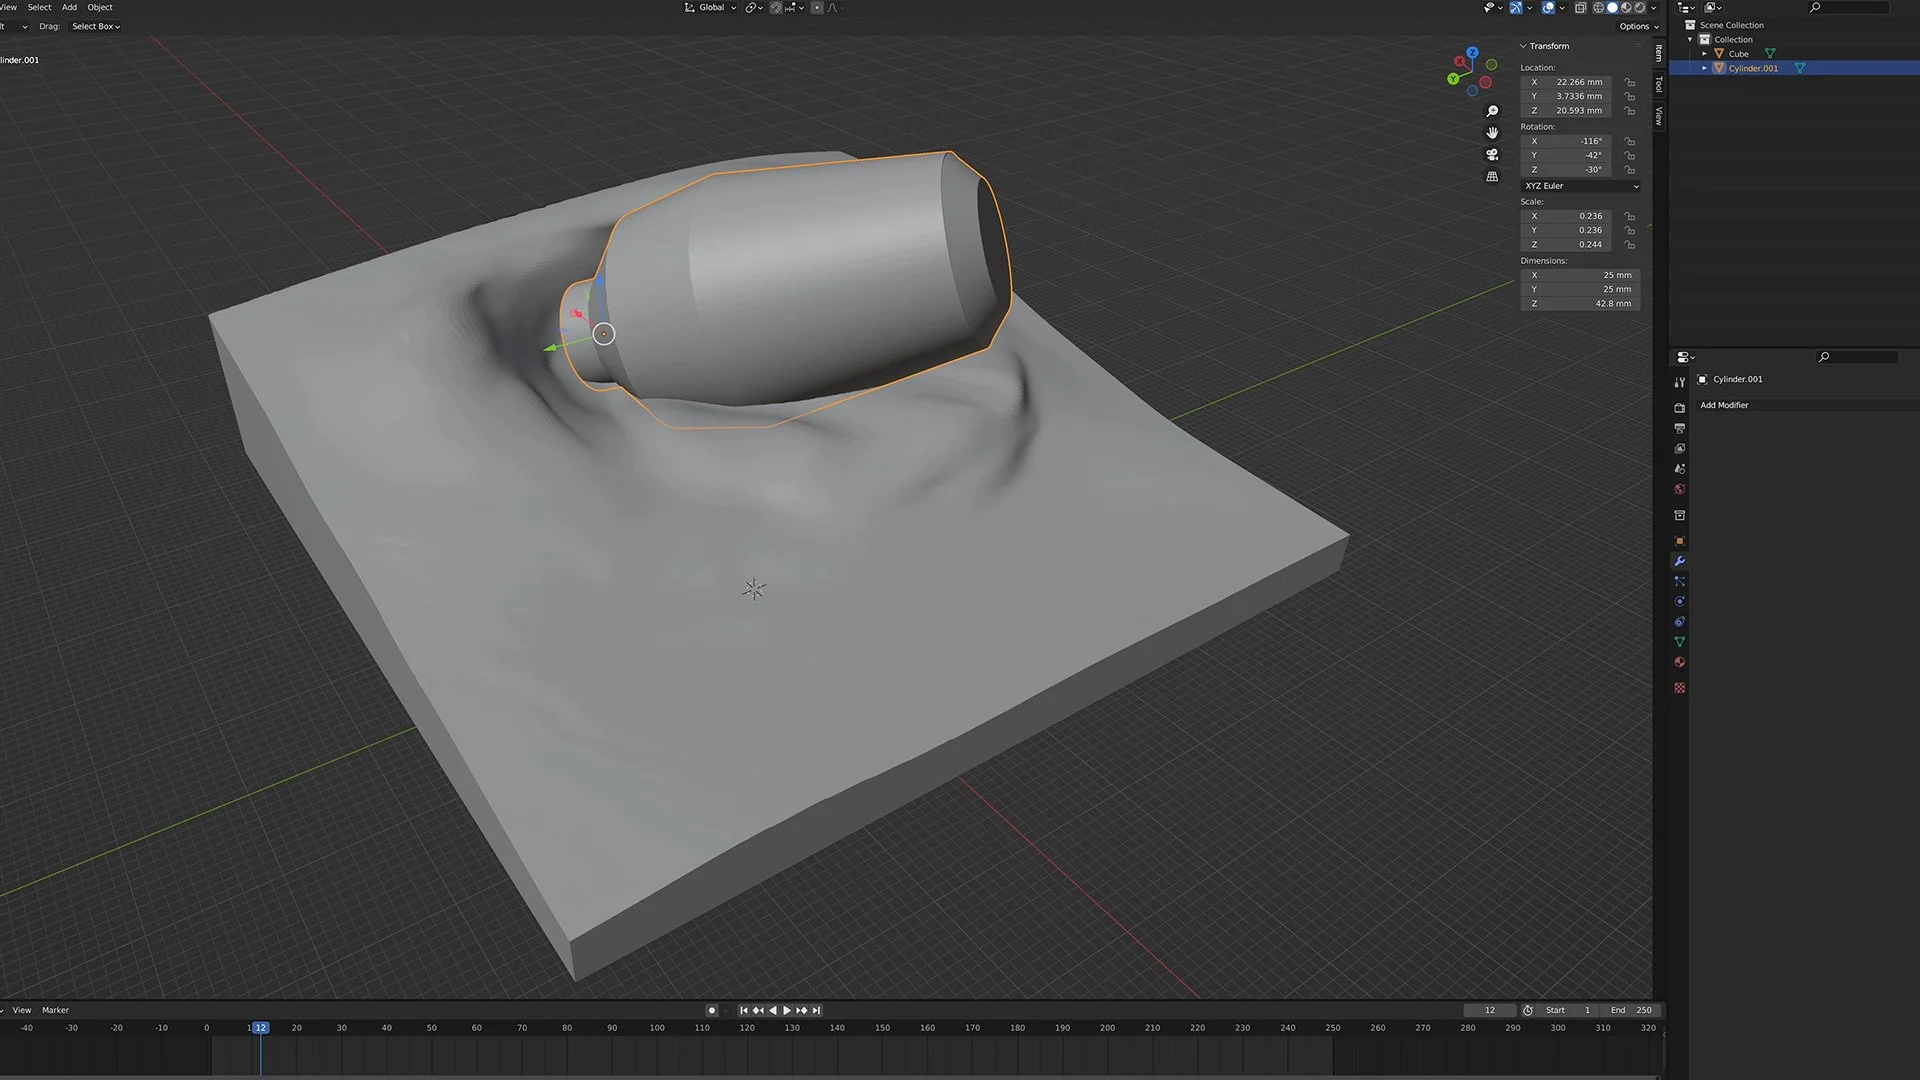
The diorama base was sculpted using Blender to create a simple, sloped design that mimics a desert landscape. To ensure a precise fit for the Escape Pod, measurements were taken with a digital caliper, and a mockup of the pod was created in Blender. The pod’s shape was subtracted from the base to form a perfect slot. A hole was added through the pod and base to accommodate a small magnet, securing the pod in place.
Additional magnets were incorporated into the base and the figures’ feet to allow flexible positioning of R2-D2 and C-3PO. This was achieved by carefully drilling holes into one of the figures’ feet and inserting magnets, ensuring they could be rearranged easily on the diorama.
2. 3D Printing the Base
The base was printed using an ELEGOO Neptune 3 Pro 3D printer with ELEGOO Gray PLA filament. The compact size of the base (3 inches by 3 inches) made it an efficient print, maintaining structural integrity for the diorama’s components.
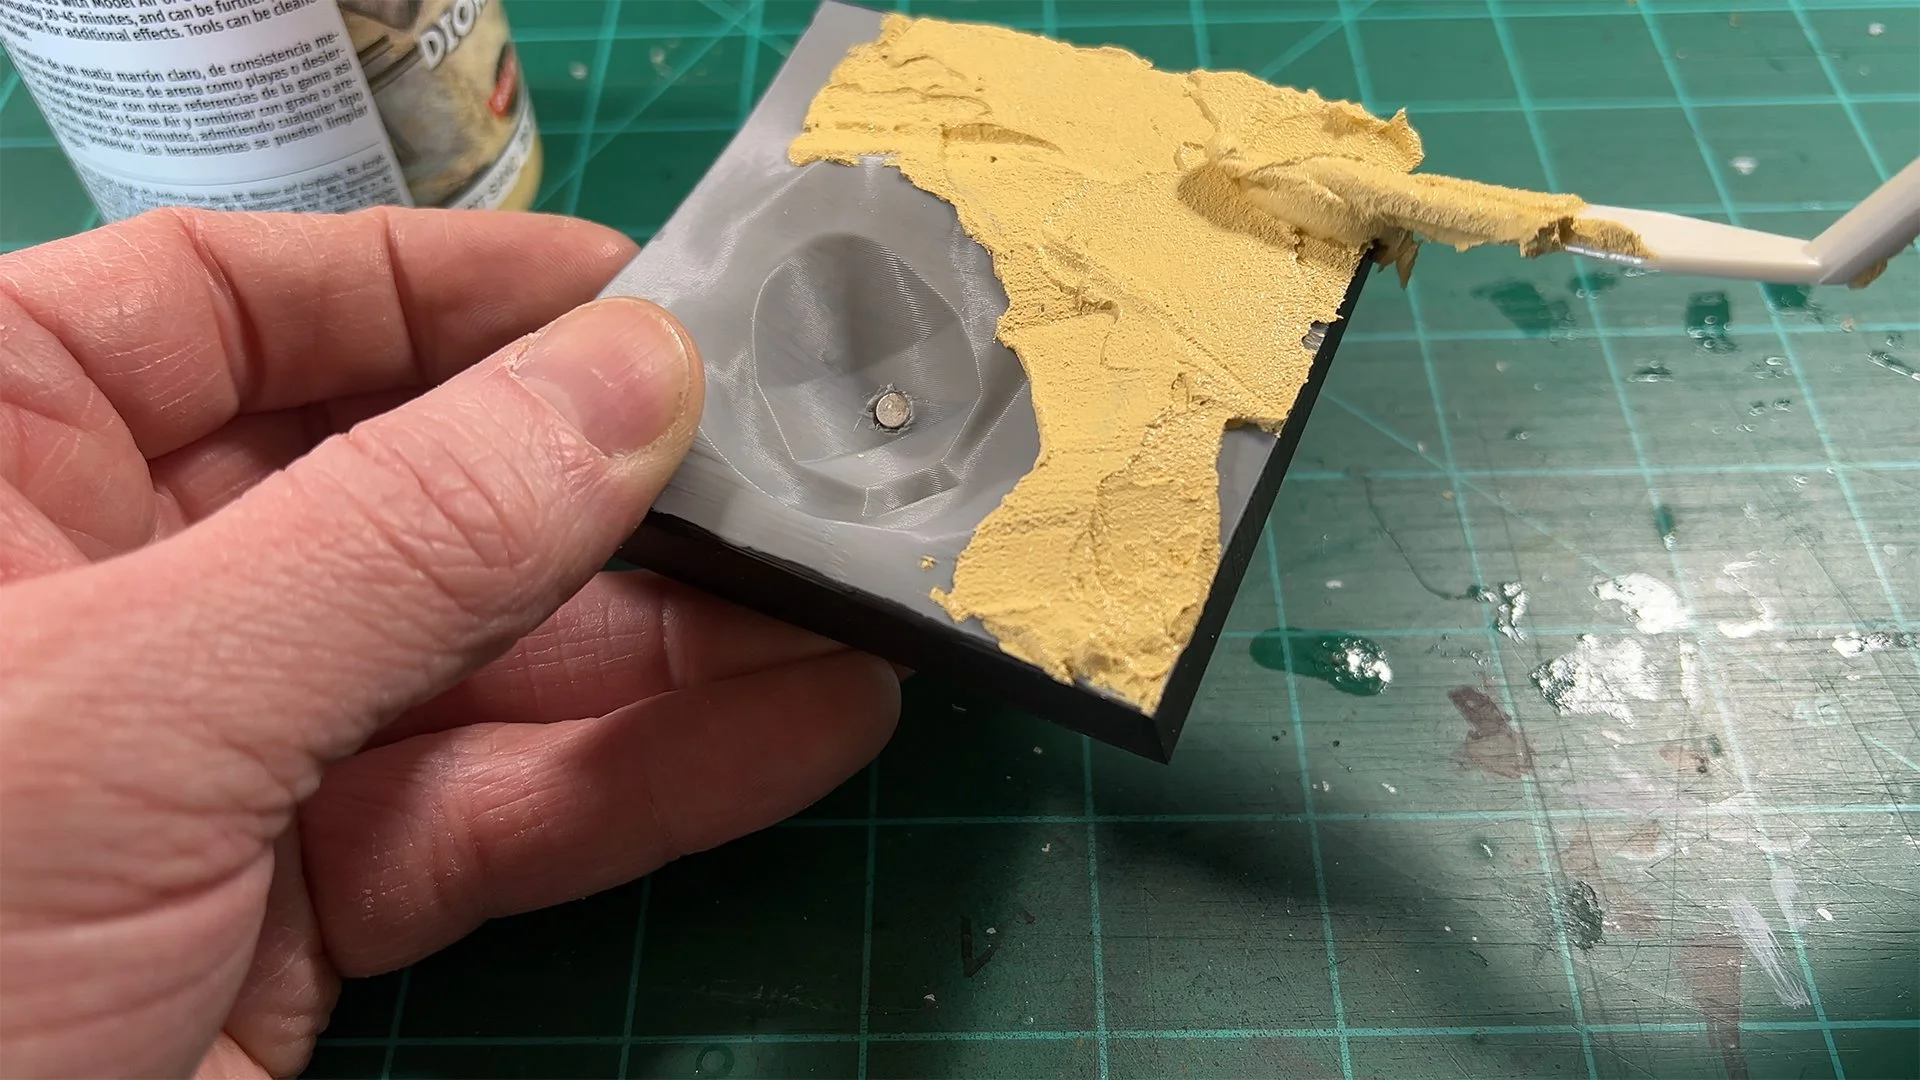
3. Painting and Weathering the Base
The painting process began with a black base coat applied to the sides of the diorama base. Vallejo’s Desert Sand texture acrylic was then applied to the top surface to create a scattered, sandy appearance, simulating the aftermath of a crash landing. A light brown coat was added, followed by a black wash to achieve a scorched, burnt sand look. Highlights in lighter brown were applied to enhance dimension and give the sand a weathered, realistic effect.
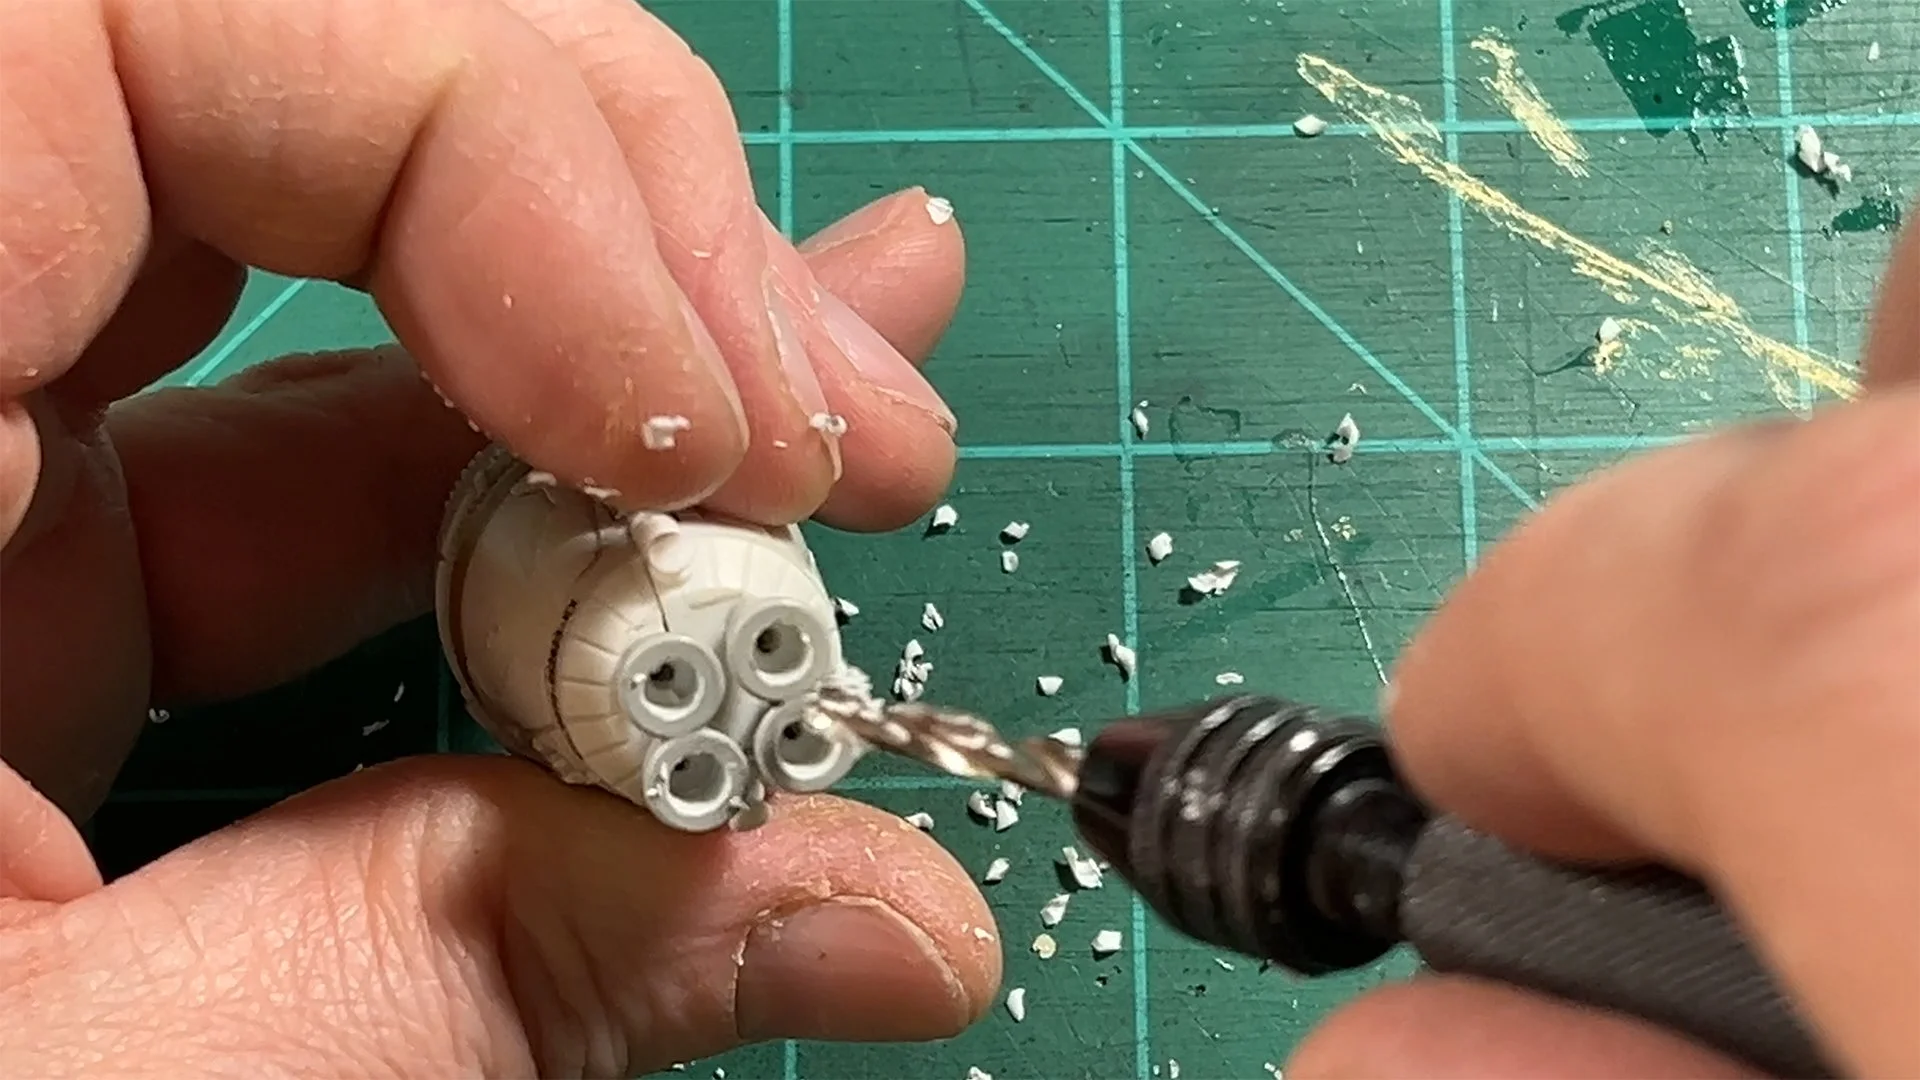
4. Detailing the Escape Pod
The Escape Pod was customized to enhance its weathered, crash-landed appearance:
Thruster Modification: Holes for the thrusters were widened using a hand drill, and the thrusters were painted with dark silver paint to add depth.
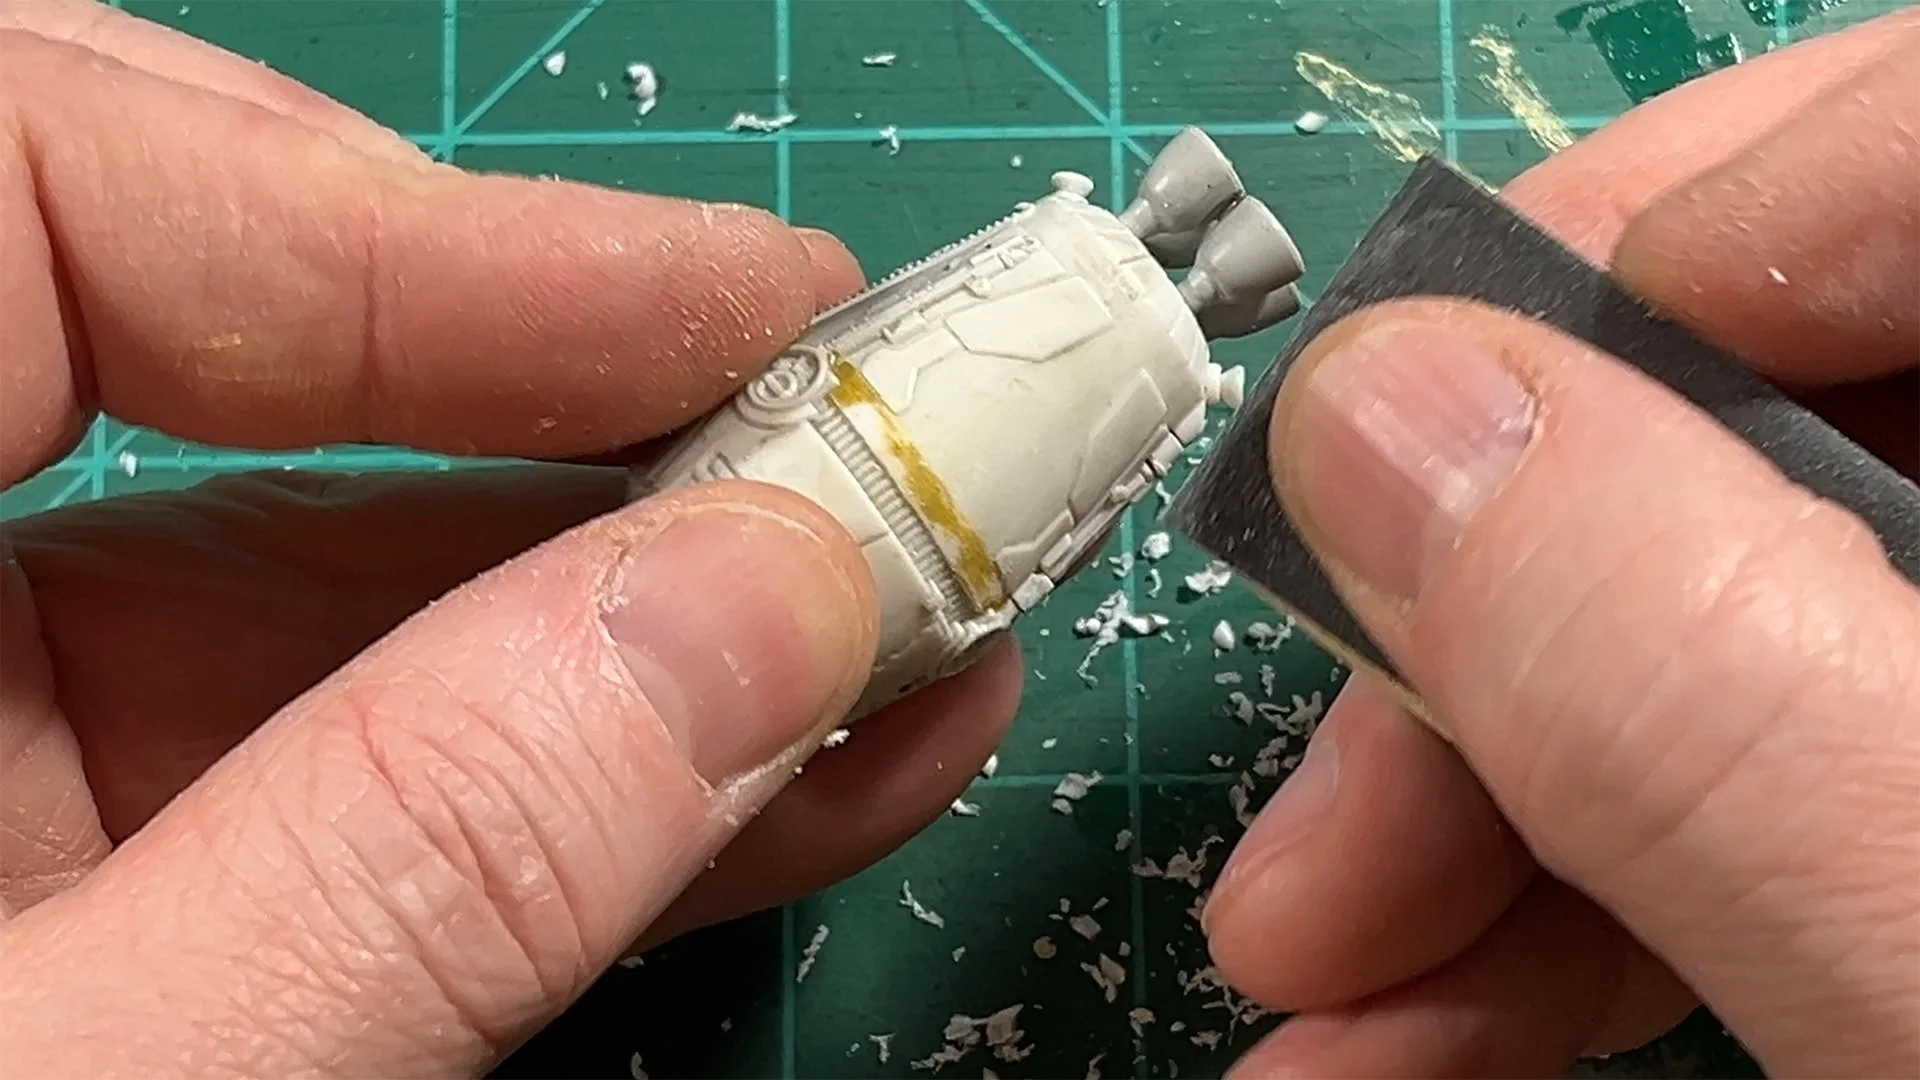
Paint Scuffing: The pod’s surface was scuffed to create a worn look, with gray paint applied to match the original color scheme.

Panel Detailing: Panel lines were drawn, and select panels were painted for added realism.
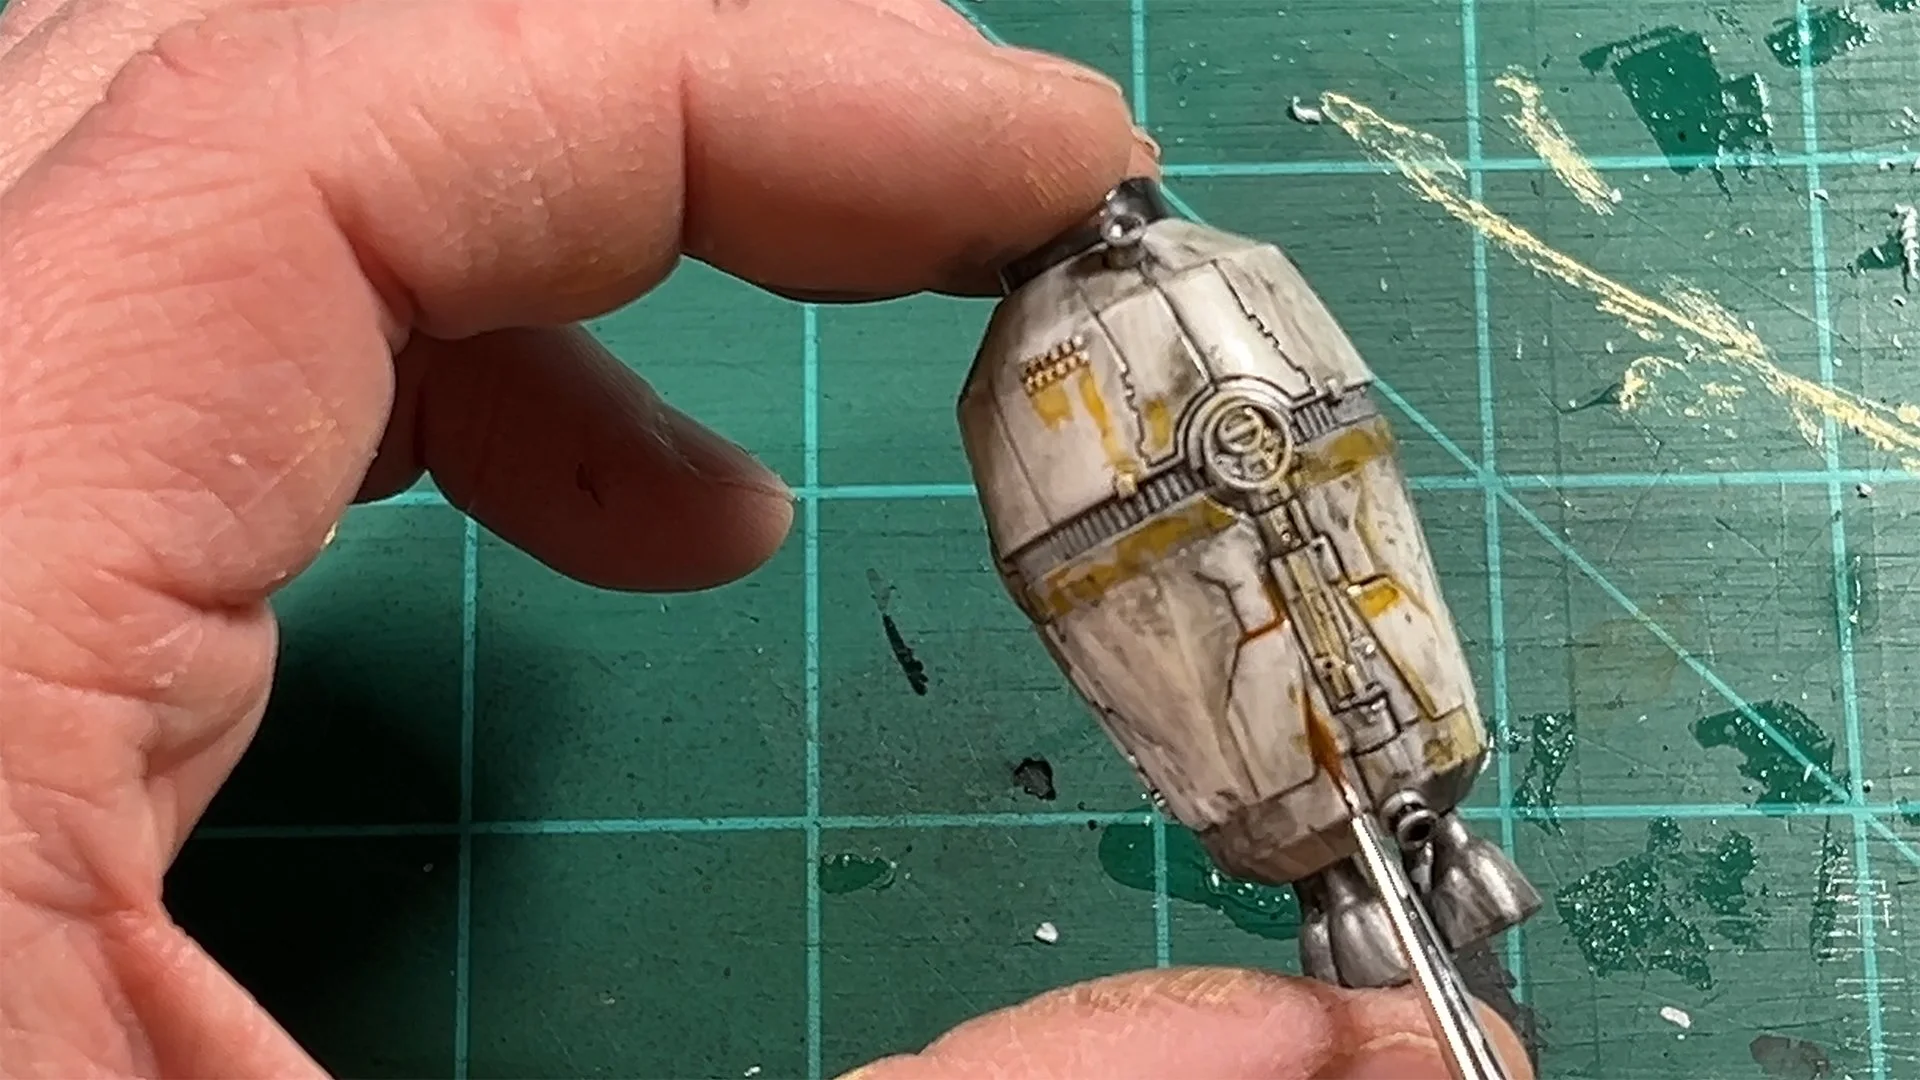
Weathering Effects: A black wash was applied and partially dabbed away while wet to create streaking effects. Rust effects and splattered highlights were added to simulate burnt oil residue.
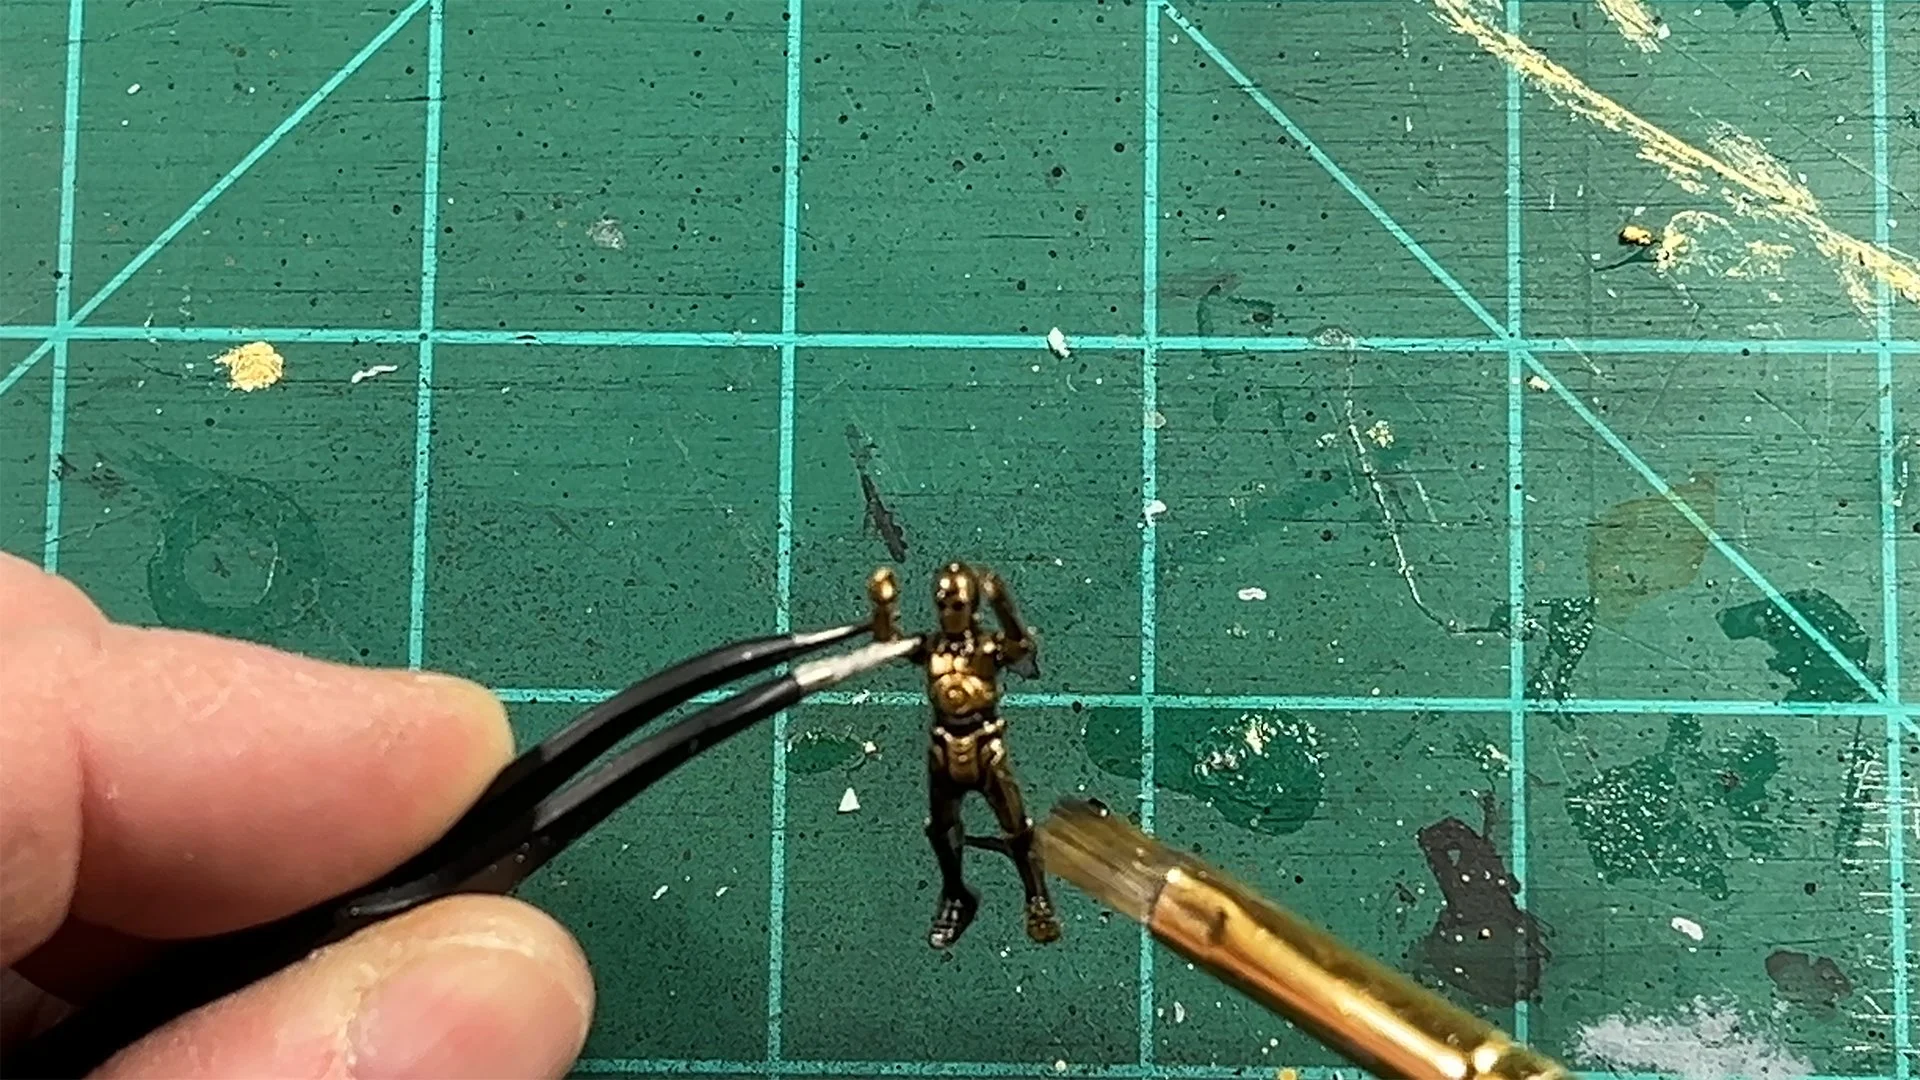
5. Enhancing the Figures
R2-D2 and C-3PO received a black wash to bring out their sculpted details, enhancing their appearance without altering their core design. The magnets in their feet allowed for easy repositioning on the diorama.
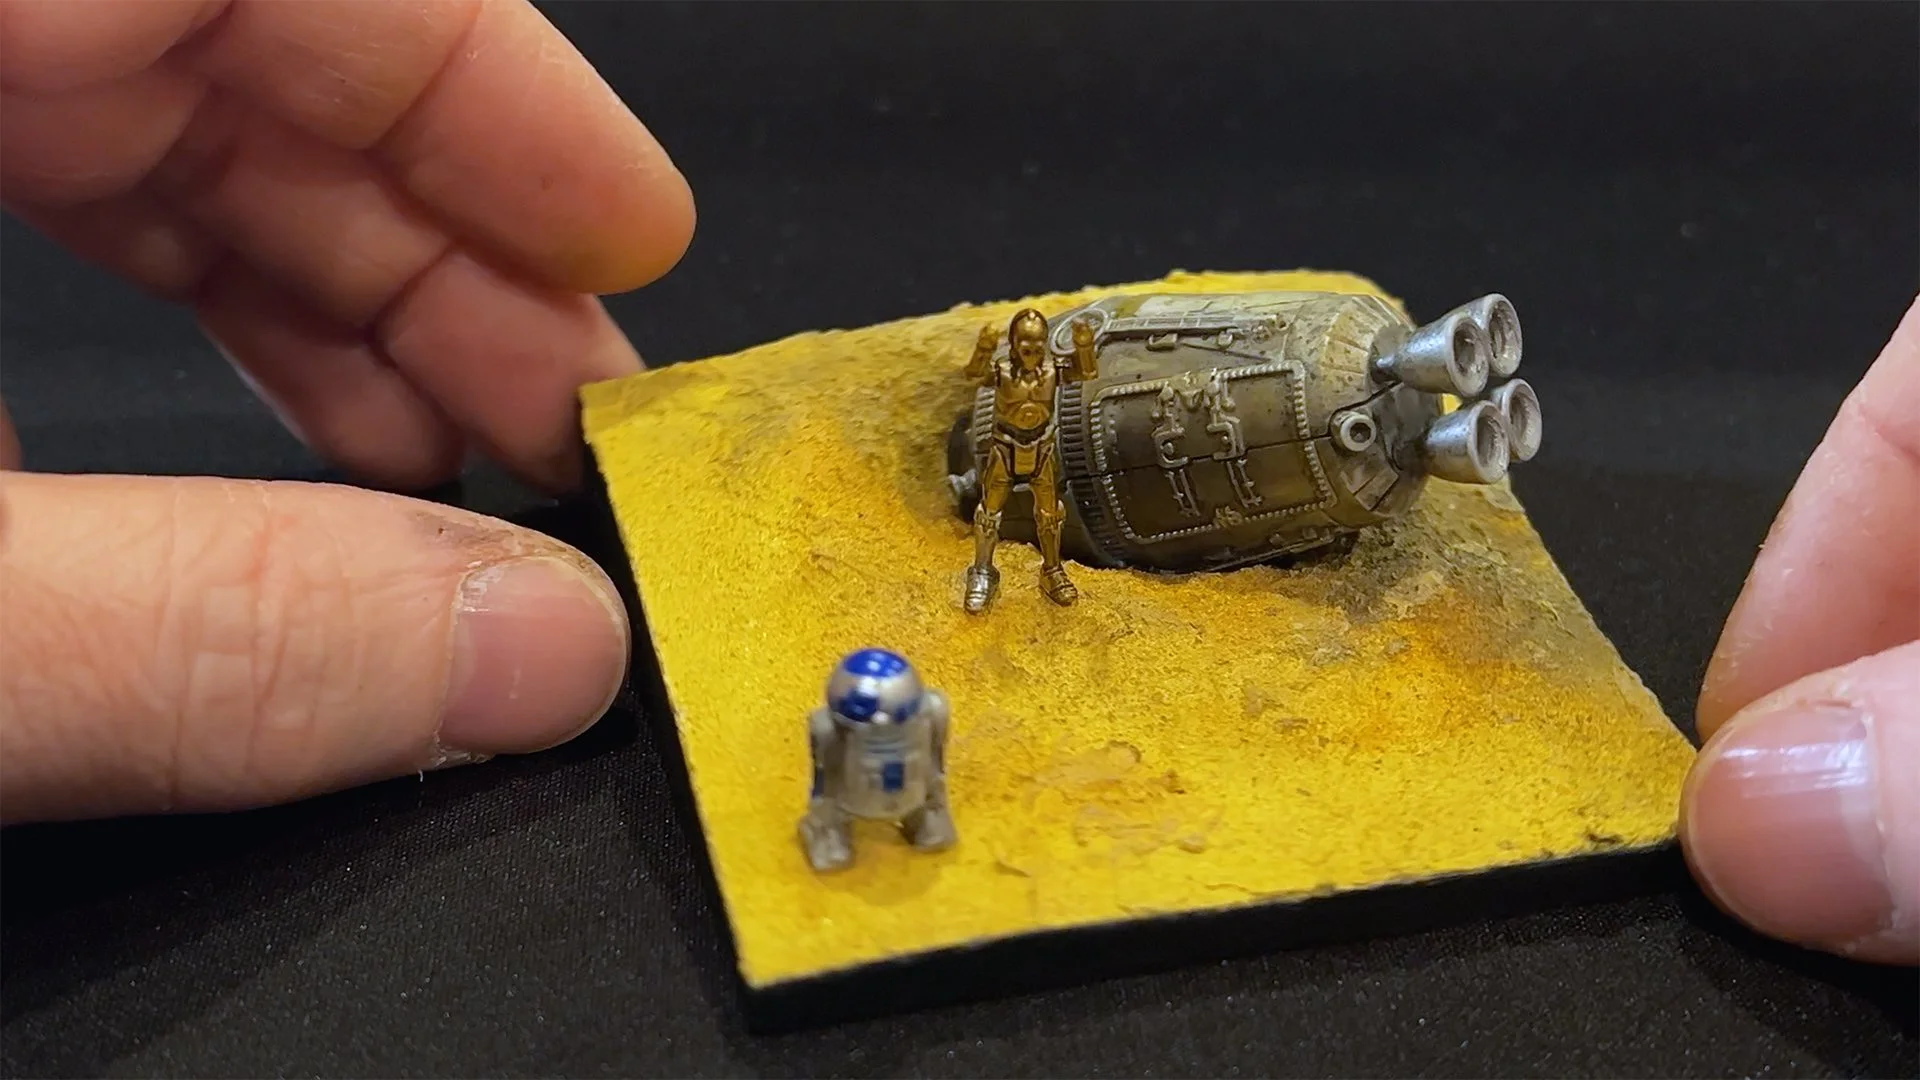
6. Final Assembly
Once all components were painted and weathered, the diorama was assembled. The Escape Pod was secured in its slot with a magnet, and the figures were placed on the base, utilizing the magnets for flexible arrangement. The result is a dynamic display that can be customized by rearranging the figures to create different scenes.
Safety Disclaimer
Crafting and DIY activities, such as drilling and handling small components, carry inherent risks. Exercise caution and prioritize safety when attempting similar projects. The creator is not responsible for any injuries or accidents that may occur.
Final Thoughts
This diorama project combines 3D printing, painting, and weathering techniques to create a compact, visually striking display for the Micro Galaxy Squadron Escape Pod. The use of magnets allows for creative flexibility, making it more engaging than a static shelf display. The weathered, desert-themed aesthetic captures the essence of a crash-landed escape pod, bringing the scene to life.

If you enjoyed this project, feel free to share your thoughts or try building your own diorama. For more details, watch the full process in the YouTube video. Thank you for your support!